If you are not 64" (162.5cm) tall, use my Height Adjustment Calculator to know exactly how much to tailor each pattern piece. Then, I'll show you how/where to add or subtract that length on your pattern pieces.
Height adjustment tutorial:
Note: There are 3 ways you could make the adjustment
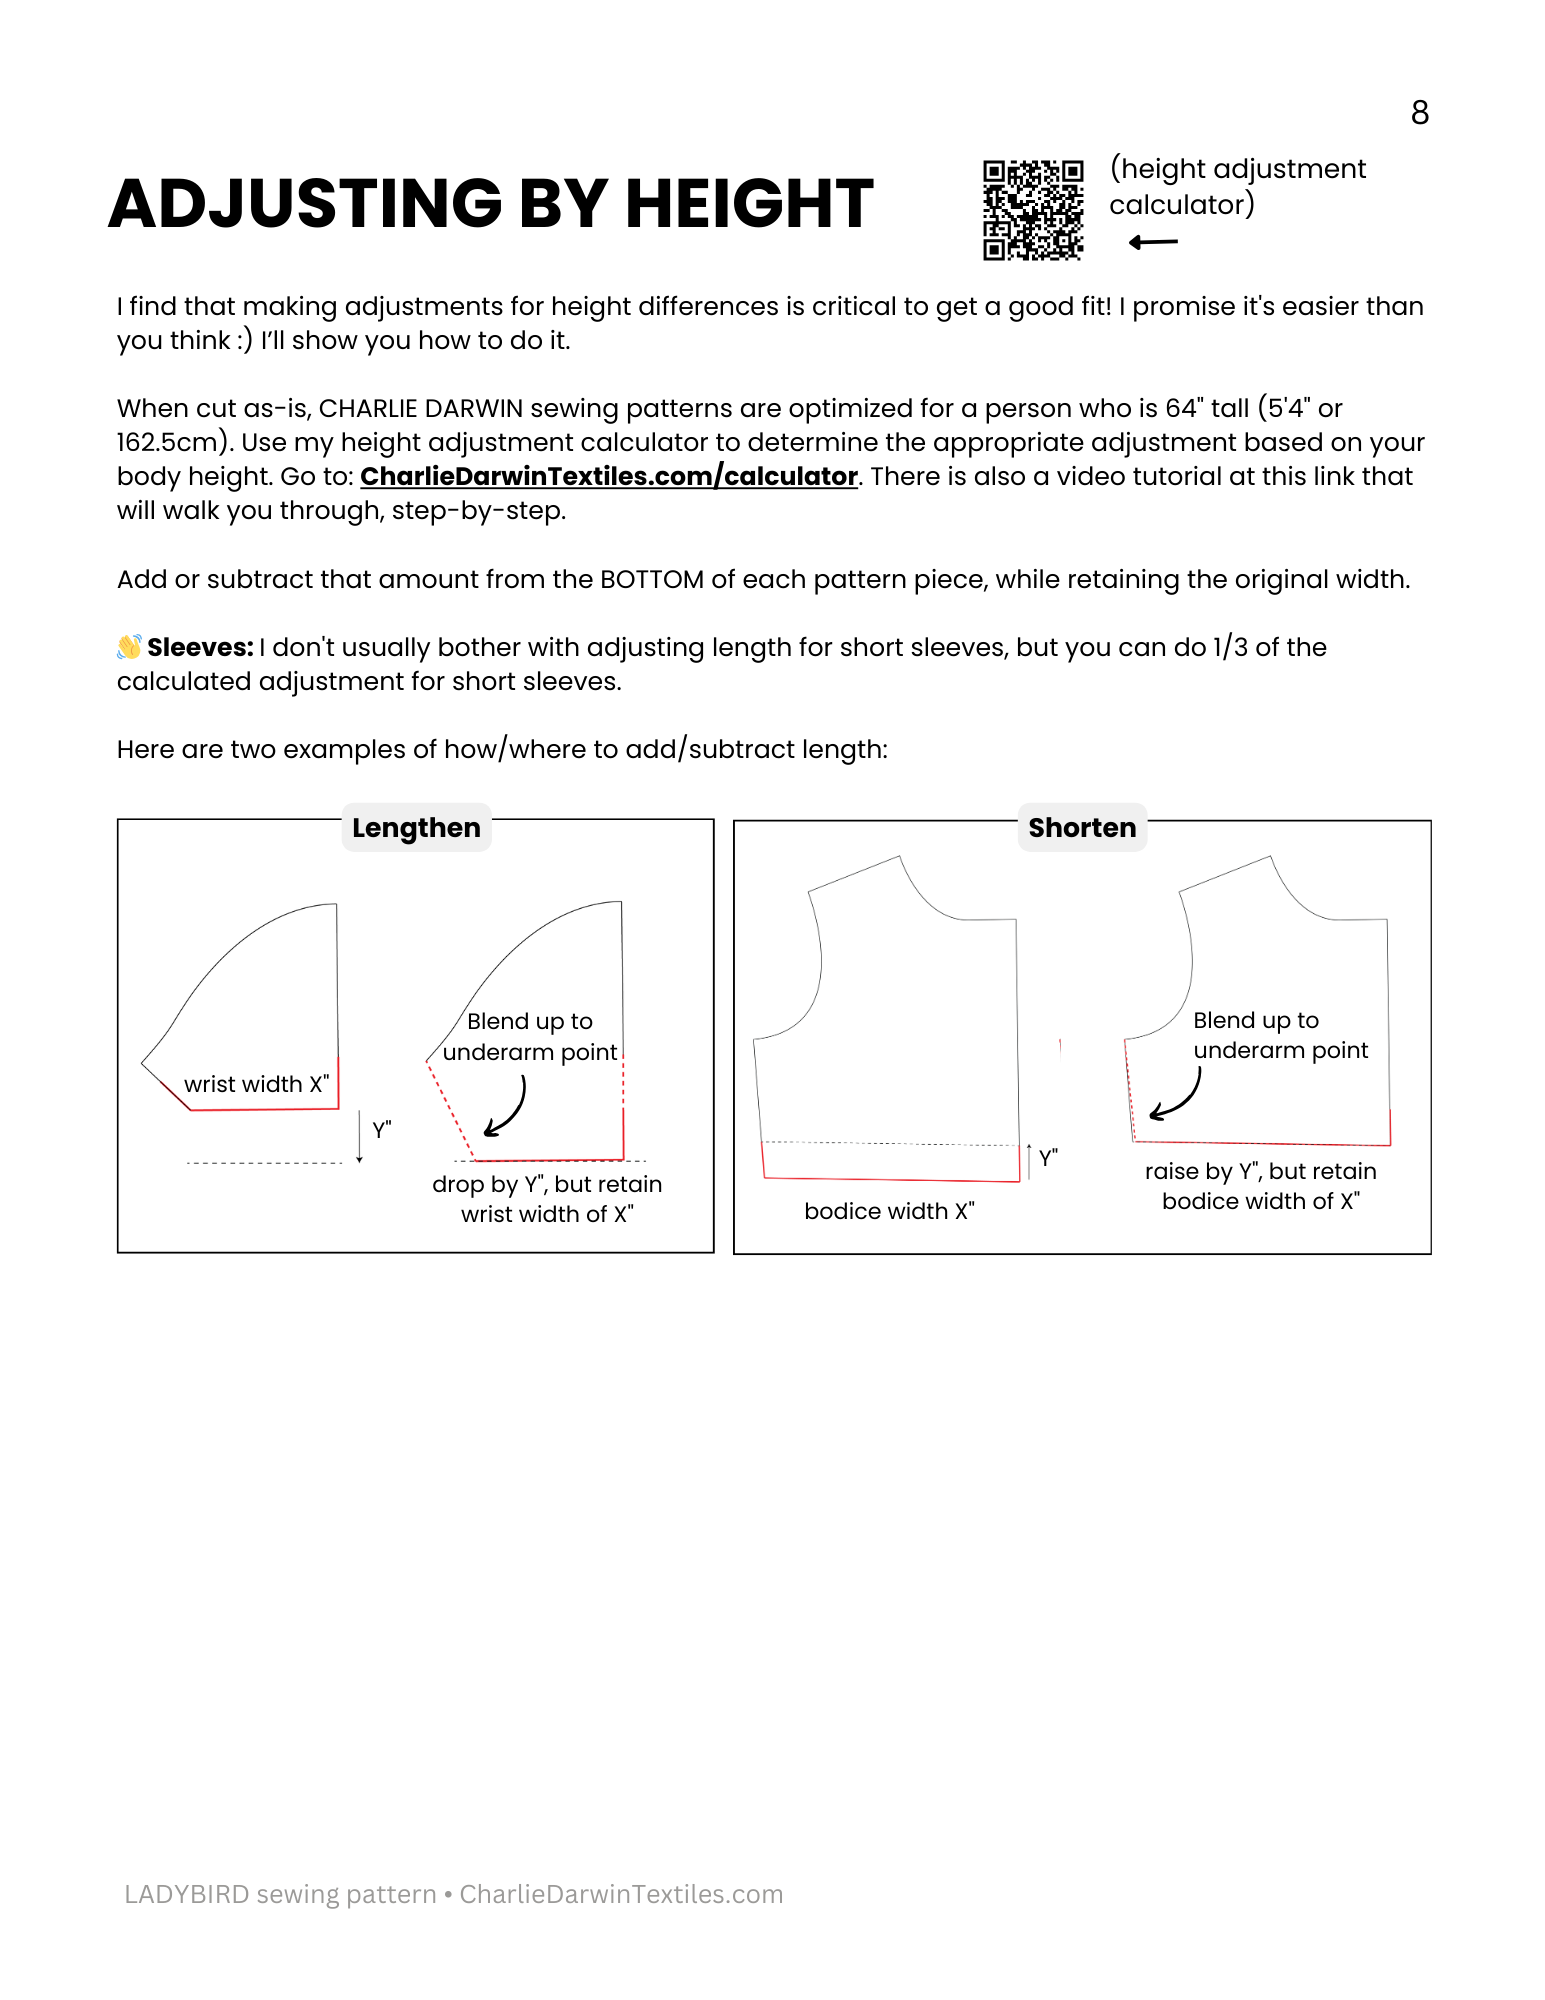
1. (Recommended) Trace directly onto the fabric: Keep your pattern pieces intact and just add/subtract the length when you go to trace the pattern onto your fabric. You can add/subtract the length from the bottom of the pattern, making sure to just shift the pattern up/down on the grainline (by the distance calculated) and keep the bottom width the same (see video and illustration below!) Make a note of your adjustment on your pattern piece so that you can repeat it the next time you make it.
2. Cut & shift: Cut a straight line (perpendicular to the grainline arrow) about 1" above the bottom of the pattern piece. Shift that bottom slice of the pattern piece up or down to adjust by the amount calculated. If you are adding space, place a piece of paper behind the pattern to fill in the gap. If you are removing space, just overlap the two pieces. Tape everything into place and reblend your lines so that they meet smoothly.
3. Make a new pattern piece: Create a totally new pattern piece by tracing your pattern onto a new piece of paper and adding/subtracting length using the steps in option 1 (and as detailed in the video below).